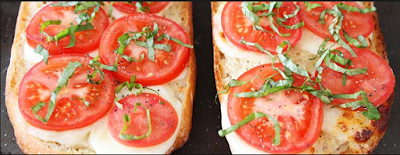
Sunday, 30 October 2016

Delicious Homemade Pop-Tarts

Description:-

Ah! Pop Tarts! 
Who doesn't love them?
They have a lovely texture complimented by delicious taste!

Information:-

According to Wikipedia:-

Pop-Tarts is a brand of rectangular, pre-baked, convenience food toaster pastries that the Kellogg Company introduced in 1964. Somewhat similar to a contemporary English mince pie tart, Pop-Tarts have a sugary filling sealed inside two layers of rectangular, thin pastry crust. Most varieties are also frosted. Although sold pre-cooked, they are designed to be warmed inside a toaster or microwave oven. They are usually sold in pairs inside Mylar (previously foil) packages, and do not require refrigeration.

Recipe:-

Pop-Tarts Pastry:

 Ingredients:

  • 375g or 12oz. Plain Flour.
  • 200g or 3/4 cup cold and cubed butter.
  • 2 tbsp. icing sugar.
  • 2 egg yolks.
  • 4 tbsp. water
  • Pinch of Salt, a generous one.
  • Egg wash (egg yolk mixed with water)

How to make:

  1.  Put the flour, icing sugar and salt in a bowl.
  2. Put the cubed butter and rub it in the mixture until the texture becomes like bread crumbs.
  3. This is called the dry mixture.
  4. Now, mix egg yolks and water and add to the dry ingredients.
  5. Mix it to form a dough.
  6. Wrap the dough in a cling wrap (plastic wrap).
  7. Refrigerate the dough for 30 minutes.
  8. At this point, the dough can be frozen for future use.
  9. Next, Roll the dough on a floured surface until it becomes 1/4 mm thick.
  10. With a knife, cut your pastry in 3 inch x 4 inch rectangles. You can also use a ruler.
  11. You will need two rectangles for each pop-tart.
  12. Apply the egg wash to the pastry. This will help the pastry to stick together.
  13. Prick the top of the pastry. this will help in the release of the steam while baking.
  14. Fill your filling until half of the pastry is filled.
  15. Trust me, you don't want to overfill it.
  16. Bake it at 400 F or 200 C for 20-25 minutes, until golden brown.
  17. Mix icing sugar, vanilla extract and water and form a thick paste.
  18. Apply this over the pastry and top it with sprinkles.

Brown Cinnamon Filling:

 Mix Together:

  1. 1/2 cup light brown or white sugar.
  2. 2 tsp. ground cinnamon.
  3. 1 tbsp. plain flour.


Social Media:-

If you like our work, don't forget to follow us on:


Twitter at:
https://twitter.com/Satyen_kulkarni

Google+ at:
https://plus.google.com/107967276868548579273

Instagram at:
https://www.instagram.com/satyenkulkarni/

Pinterest at:
https://www.pinterest.com/SatyenKulkarni/

We have also added the newsletter feature.
Subscribe to our Blog using your E-mail account to get notifications about New Posts on our Blog right into your E-mail account. It's completely free!
To subscribe, check the box in the Right Side Of The Page.
If you want to share this post check the social media buttons given below!!!
Remember, we are open for feedback!
We are also giving shout-outs on Twitter to anyone who is requesting a recipe!
If you are viewing this on a smart-phone, go to the bottom of the page and press view web version!
Happy Cooking!

Friday, 28 October 2016

Diwali Recipe - Chakli

Description:-

Diwali is a major festival in Indian Tradition.
It is celebrated with foodstuffs like the Chakli.
So, lets get on with the information!

Information:-

According to Wikipedia

Chakli is a savoury snack from India. It is a spiral shaped, pretzel-like snack with a spiked surface.

Chakli is typically made from flours of rice, bengal gram (chickpea) and black gram (udad daal). It has several variations, depending on the types and proportion of flours used. Murukku, a similar snack typically made without the Bengal gram flour, is also sometimes called "chakli".


Recipe:-

Ingredients

  • 1 cup rice flour
  • 1/2 cup gram flour
  • 2.5 tbsp. oil
  • 3/4 cup water
  • 1/4 tsp. turmeric
  • 1/2 tsp. carom/ajwain seeds
  • 1/2 tsp. cumin seeds
  • 1 tsp. red chili powder
  • Pinch of asafoetida/hing 
  • 1 tbsp. sesame seeds
  • Salt as required
  • Oil for frying

How to make

  1.  Take rice and gram flour in a bowl.
  2. Add carom seeds, sesame seeds, turmeric powder, cumin seeds, red chili powder, asafoetida and salt.
  3. Mix everything with a spoon.
  4. Heat oil in a bowl.
  5. Add the hot oil to the flour mixture.
  6. Mix oil and flour with your fingers.(ah! messy!)
  7. Bring water to a boil.
  8. Add hot water with the flour mixture and mix with spoon.
  9. Add more water as required.
  10. Knead and form a dough.
  11. Cover the dough and let it rest for 30 minutes.
  12. Take a chakli maker (image given below) and apply some water to it.
  13. Fill the chakli maker with the dough.
  14. Press the lid and move it in round to form a spiral form of the dough.
  15. Make them on butter paper so that they are easy to remove.
  16. Make them with a radius of approximately 3-4 centimeters.
  17. Heat oil in a frying pan.
  18. After the oil is heated, put the spiral dough, the chaklis, in the pan.
  19. Fry them till they become golden brown.
  20. Soak the oil of the chaklis on a tissue paper.
  21. Serve plain or with Indian style tea.
  22. Tips are given below in case of any misshapen.

Tips:-

  1.  If the chakli breaks while forming circles, add 1 or 2 tbsp. of water and knead the dough again.
  2. If you are not getting the proper shape, then the dough is too moist. Add some flour and knead it again.
  3. To check the temperature of the oil, take a small piece of dough and put it in the pan. If it rises, the oil is hot, if it settles at bottom, then the oil is cold.
  4. Taste the small piece of fried dough, if it is too hard, then add 1/2 tbsp. of oil to the rest of the dough and knead.
  5. Take the first batch of the chakli, if it has absorbed oil, then add some rice flour to the rest of the dough.


 Note:-

We wish all of you a Happy Diwali and a prosperous life ahead!


Social Media:-

If you like our work, don't forget to follow us on:


Twitter at:
https://twitter.com/Satyen_kulkarni

Google+ at:
https://plus.google.com/107967276868548579273

Instagram at:
https://www.instagram.com/satyenkulkarni/

Pinterest at:
https://www.pinterest.com/SatyenKulkarni/

We have also added the newsletter feature.
Subscribe to our Blog using your E-mail account to get notifications about New Posts on our Blog right into your E-mail account. It's completely free!
To subscribe, check the box in the Right Side Of The Page.
If you want to share this post check the social media buttons given below!!!
Remember, we are open for feedback!
We are also giving shout-outs on Twitter to anyone who is requesting a recipe!
If you are viewing this on a smart-phone, go to the bottom of the page and press view web version!
Happy Cooking!

Sunday, 23 October 2016

Mouth-watering Date & Chocolate Cake

Description:-

The date and chocolate cake is just heavenly!
The texture of the chocolate and the flavor of the dates gets me to Cloud 9!


History:-

According to Wikipedia:-

The term "cake" has a long history. The word itself is of Viking origin, from the Old Norse word "kaka".
Although clear examples of the difference between cake and bread are easy to find, the precise classification has always been elusive. For example, banana bread may be properly considered either a quick bread or a cake.
The Greeks invented beer as a leavener, frying fritters in olive oil, and cheesecakes using goat's milk. In ancient Rome, basic bread dough was sometimes enriched with butter, eggs, and honey, which produced a sweet and cake-like baked good.Latin poet Ovid refers to the birthday of him and his brother with party and cake in his first book of exile, Tristia.
Early cakes in England were also essentially bread: the most obvious differences between a "cake" and "bread" were the round, flat shape of the cakes, and the cooking method, which turned cakes over once while cooking, while bread was left upright throughout the baking process.
Sponge cakes, leavened with beaten eggs, originated during the Renaissance, possibly in Spain.


 Recipe:-

Ingredients:- 

  • 225 grams of All-Purpose Flour
  • 200 grams of Powdered Sugar
  • 120 grams Butter
  • 1 bowl of Dates with seed removed
  • 1/2 bowl of Walnuts
  • 1 tsp. Baking Powder
  • 2 Eggs
  • 2 tsp. Vanilla Essence
  • A pinch of Soda

How to make:-

  1. Apply Molten Butter to the Baking Pan.
  2. Soak the dates in 3-4 tbsp. of water with the Soda.
  3. Strain the Flour, Baking Powder and Powdered sugar through a wire mesh 3 times.
  4. Separate the egg white and the egg yolks.
  5. Whisk the egg whites, yolks and the butter separately.
  6. Then, put the whites, yolks and butter in a bowl.
  7. Whisk them together this time.
  8. Then mix them with the Flour and vanilla essence.
  9. Then, add the dates and walnuts to the mixture.
  10. Pour the cake mixture into the baking pan.
  11. Bake the cake at 180 C for 30 minutes.

 Serving Suggestion:-

  1. Sprinkle small bits of crushed walnuts on top of the cake!


Social Media:-

If you like our work, don't forget to follow us on:


Twitter at:
https://twitter.com/Satyen_kulkarni

Google+ at:
https://plus.google.com/107967276868548579273

Instagram at:
https://www.instagram.com/satyenkulkarni/

Pinterest at:
https://www.pinterest.com/SatyenKulkarni/

We have also added the newsletter feature.
Subscribe to our Blog using your E-mail account to get notifications about New Posts on our Blog right into your E-mail account. It's completely free!
To subscribe, check the box in the Right Side Of The Page.
If you want to share this post check the social media buttons given below!!!
Remember, we are open for feedback!
We are also giving shout-outs on Twitter to anyone who is requesting a recipe!
If you are viewing this on a smart-phone, go to the bottom of the page and press view web version!
Happy Cooking!
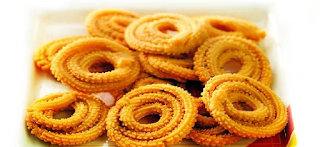
I

Sunday, 16 October 2016

Malvani Fish Curry

Description:-

This recipe comes from Malvan, Maharashtra that is India.
I recently visited the place and eventually decided to post a recipe.
This Fish curry is not an ordinary one!
Its spicy while maintaining its deliciousness!

Information:-

According to Wikipedia :-

Malvani cuisine is the standard cuisine of the Konkan region of Maharashtra and Goa, and some northern parts of West Karnataka. Although Malvani cuisine is predominantly non-vegetarian, there are many vegetarian delicacies. Although it is an independent cuisine, it overlaps Maharashtrian cuisine and Goan cuisine. Malvan is a town in the Sindhudurg district on the west coast of Maharashtra.

Recipe:-


Ingredients:-

  • 500 grams. King Fish(Surmai).
  • 1 tsp. Cumin Seeds.
  • 2 tsp. Coriander Seeds.
  • Dried Chilies 4-5.
  • Turmeric Powder (to taste or a pinch)
  • Salt (to taste).
  • 2 Onions chopped.
  • 3-4 cups of Scraped Coconut.
  • Black Peppercorns 6-7.
  • Oil.
  • 1 Tomato chopped.
  • 1 tbsp. Tamarind Pulp. To get the pulp, soak the tamarind in 2 tbsp. water and squeeze.

How to make:-

Step one:-

  1. First, lightly roast cumin seeds and coriander seeds.
  2. Grind them. Pestle and Mortar is the best way if you have time.
  3. Next, add the salt and the turmeric powder to the ground seeds, that is the above given powder.
  4. Then add the mixture of these powders to the fish pieces and keep them aside.

 Step two:-

  1. Take an onion, the coconut and the peppercorns.
  2. Grind them to make a coarse paste.

Step three:-

  1. Heat oil in a pan and add the onion and saute till it gets brown.
  2. Add the Tomato and saute till oil leaves the sides.
  3. Add the coconut paste and cook it for a minute on a high flame.
  4. Then add 2 cups of water and bring it to a boil. Thus, the gravy is done!

Step four:-

  1. Add the fish pieces and cook it for 5-6 minutes on a medium heat.
  2. Finally, add salt to taste and the tamarind pulp.
  3. Let it simmer for 5-6 minutes.
  4. Serve hot with Indian Bread(Roti) or Rice (steamed)

Note:-

I know this recipe is gigantic! 
But it has its perks!
Once cooked, it tastes heavenly!
This was requested by a reader, so, here it is!


Social Media:-

If you like our work, don't forget to follow us on:


Twitter at:
https://twitter.com/Satyen_kulkarni

Google+ at:
https://plus.google.com/107967276868548579273

Instagram at:
https://www.instagram.com/satyenkulkarni/

Pinterest at:
https://www.pinterest.com/SatyenKulkarni/

We have also added the newsletter feature.
Subscribe to our Blog using your E-mail account to get notifications about New Posts on our Blog right into your E-mail account. It's completely free!
To subscribe, check the box in the Right Side Of The Page.
If you want to share this post check the social media buttons given below!!!
Remember, we are open for feedback!
We are also giving shout-outs on Twitter to anyone who is requesting a recipe!

Sunday, 9 October 2016

Non-Alcoholic Irish Coffee

This recipe was requested by Saloni Kulkarni.
She is getting a shout-out, that is, her twitter account will be promoted by us(400 followers)
Her twitter link is:

Description:-

The Irish Coffee is a delicious drink to enjoy anytime, anywhere!
For the people who don't drink alcohol, we have brought to you, the non-alcoholic Irish coffee!

History:-

According to Wikipedia :-

Stanton Delaplane, a travel writer for the San Francisco Chronicle, brought Irish coffee to the United States after drinking it at Shannon Airport, when he worked with the Buena Vista Cafe in San Francisco to start serving it on November 10, 1952, and worked with the bar owners Jack Koeppler and George Freeberg to recreate the Irish method for floating the cream on top of the coffee, sampling the drink one night until he nearly passed out. The group also sought help from the city's then mayor, George Christopher, who owned a dairy and suggested that cream aged at least 48 hours would be more apt to float. Delaplane popularized the drink by mentioning it frequently in his travel column, which was widely read throughout America. In later years, after the Buena Vista had served, by its count, more than 30 million of the drinks, Delaplane and the owners grew tired of the drink. A friend commented that the problem with Irish coffee is that it ruins three good drinks: coffee, cream, and whiskey.


Recipe:-

  Ingredients:-

  • 2 cups of strong Coffee.
  • 2 tsp. lemon juice.
  • Whipped Cream.
  • 2 tsp. Orange Juice.

How to make:-

  1. Take the 2 cups of strong (concentrated) Coffee in a vessel (saucepan).
  2. Take the Orange Juice and mix it with the Coffee.
  3. Then, take the Lemon Juice and mix.
  4. You can also  mix the juices and the coffee at the same time, but if you mix them one after another as advised above, you may avoid some major fuss.
  5. Then, pour it in a tall glass.
  6. Make sure you leave some room for the whipped cream.
  7. Finally, top the Coffee with whipped cream.
  8. Your Coffee is ready!


Social Media:-

If you like our work, don't forget to follow us on:


Twitter at:
https://twitter.com/Satyen_kulkarni

Google+ at:
https://plus.google.com/107967276868548579273

Instagram at:
https://www.instagram.com/satyenkulkarni/

Pinterest at:
https://www.pinterest.com/SatyenKulkarni/

We have also added the newsletter feature.
Subscribe to our Blog using your E-mail account to get notifications about New Posts on our Blog right into your E-mail account. It's completely free!
To subscribe, check the box in the Right Side Of The Page.
If you want to share this post check the social media buttons given below!!!
Remember, we are open for feedback!
We are also giving shout-outs on Twitter to anyone who is requesting a recipe!

Sunday, 2 October 2016

Easy & Delicious Garlic Bread

Description:-

I am in love with this recipe! 
I am sure you will be too! 
This is a absolutely phenomenal recipe.
It is easy and tastes delicious!
So without any further delay, lets begin!

Information:-

According to Wikipedia :-

Garlic bread (also garlic toast) consists of bread (usually a baguette or sour dough like a ciabatta), topped with garlic and olive oil or butter and may include additional herbs, like chives. It is then either grilled or broiled until toasted, or baked in a conventional or bread oven.

Recipe:-


Ingredients:-

  • 1 loaf of Bread, cut in slices.
  • 4 tbsp. Butter softened, not melted.
  •  2 tsp. dried Parsley.
  • 1/2 tsp. Garlic Powder.

How To Make:-

  1. Take a loaf of bread, and apply butter on both the sides of it.
  2. Take a pinch of Parsley and season the buttered bread on both the sides.
  3. Then, take the Garlic Powder ad season the bread on both the sides.
  4. Take a skillet or a pan and heat it.
  5. After the pan gets heated, lower the flame to a medium one.
  6. Then, put the bread on the pan and let it get brown on both the sides.
  7. Your Garlic Bread is ready.

Serving Suggestions:-

  1. Cut a tomato into slices and place them on the top of the Garlic Bread and sprinkle some herbs over it. Enjoy!


Social Media:-

If you like our work, don't forget to follow us on:


Twitter at:
https://twitter.com/Satyen_kulkarni

Google+ at:
https://plus.google.com/107967276868548579273

Instagram at:
https://www.instagram.com/satyenkulkarni/

Pinterest at:
https://www.pinterest.com/SatyenKulkarni/

We have also added the newsletter feature.
Subscribe to our Blog using your E-mail account to get notifications about New Posts on our Blog right into your E-mail account. It's completely free!
To subscribe, check the box in the Right Side Of The Page.
If you want to share this post check the social media buttons given below!!!
Remember, we are open for feedback!
We are also giving shout-outs on Twitter to anyone who is requesting a recipe!