Showing posts with label food. Show all posts

Wednesday, 5 June 2019

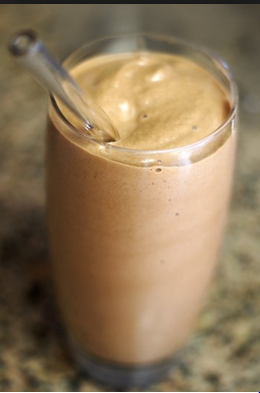
Coffee Smoothie | Low Calorie Smoothie Series


Let me start this post by thanking all of the readers out there, because you kept reading this blog even when I wasn't posting anything.

But, I am extremely happy to announce that I am back! And this time, I will be bringing amazing recipes which are easy to make and delicious to eat! I really hope that you all will like it.

So, this recipe series is requested by a friend of mine, who I think, wants to remain anonymous.
This recipe request is the reason that I started blogging again. Once that I started it, I felt again, the joy of blogging, and decided to continue. If you want to request a recipe, write it in the comments or the recipe request page (You can post anonymously as well), or send me a message (or a tweet!), the links to my social media pages are given below!

So, this is a "Low Calorie Smoothie Series", I will be posting different kinds of smoothies which will include Vegetables and Fruits as well. But since it is really hot here, in India, I wanted to start with a rather cool, refreshing and energizing drink.

This recipe isn't just low calorie but it is also refreshing and energizing. So, if you want some energy after waking up in the morning, this is the recipe to go to.

If you don't drink coffee, DON'T WORRY. I have got your back! I will be posting a fruit and vegetable smoothie in the coming days.

So, let's take a look at the recipe!

Recipe:

Ingredients:

  1.       Low fat milk, 1 cup (You can use normal milk, but there will be an increase in the calories).
  2.       A small banana, 1 (It gives a smooth texture to the smoothie. Don't worry, it tastes delicious).
  3.       Honey , 1 teaspoon (For the sweetness).
  4.       Cocoa powder, 1 teaspoon (Gives it a really nice chocolaty flavour).
  5.       Instant Coffee, 2 teaspoons.
  6.       Vanilla essence or vanilla extract, as per taste.
  7.       Crushed ice (You can also use small ice cubes).

 Procedure:

  • Take the small banana and roughly break it into small pieces.
  • Next, in a blending vessel (food processor/mixer/blender), take the milk and add the honey, cocoa powder, vanilla essence and the coffee.
  • Blend until it is nicely mixed.
  • Next, add the banana and blend till there are no more chunks of banana left.
  • Next, add the crushed ice and blend.
  • Your coffee smoothie is ready.

 Points to remember:

  1.  Blend the ingredients in the specific order given.
  2. This differs from a "Cold Coffee" because the banana, cocoa powder and vanilla essence make it a "Smoothie".


Social Media:-

If you like my work, don't forget to follow me on:
We have also added the newsletter feature.
Subscribe to our Blog using your E-mail account to get notifications about New Posts on our Blog right into your E-mail account. It's completely free!
To subscribe, check the box in the Right Side Of The Page.
If you want to share this post check the social media buttons given below!!!
Remember, we are open for feedback!
We are also giving shout-outs on Twitter to anyone who is requesting a recipe!
If you are viewing this on a smart-phone, go to the bottom of the page and press view web version!
Happy Cooking!

Sunday, 18 September 2016

Delicious & Lovely Pancakes

Description:-

Pancakes is a dish that is loved by people of all ages, from Children to Adult and even the Old.
It is a delicious way to enjoy your breakfast.
Pancakes with Butter or Strawberries on top is just heavenly.


History:-

According to Wikipedia-

The Ancient Greeks made pancakes called τηγανίτης (tēganitēs), ταγηνίτης (tagēnitēs) or ταγηνίας (tagēnias), all words deriving from τάγηνον (tagēnon), "frying pan". The earliest attested references on tagenias are in the works of the 5th century BC poets Cratinus and Magnes. Tagenites were made with wheat flour, olive oil, honey, and curdled milk, and were served for breakfast. Another kind of pancake was σταιτίτης (staititēs), from σταίτινος (staitinos), "of flour or dough of spelt", derived from σταῖς (stais), "flour of spelt". Athenaeus mentions, in his Deipnosophistae, staititas topped with honey, sesame, and cheese. The Middle English word Pancake appears in English in the 15th century.
The Ancient Romans called their fried concoctions "alia dulcia", which was Latin for "other sweets". These were much different from what are known as pancakes today.

Recipe:- 


Ingredients:-

  • 1 cup All Purpose Flour
  • 2 tbsp Sugar
  • 2 tsp Baking Powder
  • 1 tsp Salt
  • 1 Beaten Egg
  • 1 cup Milk
  • 2 tbsp Vegetable Oil

How To Make:- 

  1. Take a Bowl and put All Purpose Flour into it.
  2. Then, add the Sugar, Baking Powder and Salt to it and mix it well. This is the Dry Mixture.
  3. Take another Bowl and mix the Egg, Milk and Vegetable Oil. Mix it well. This is the Wet Mixture.
  4. The two separate mixtures are made to prevent trouble of mixing all the ingredients together.
  5. Then make a well in the Dry Mixture and add the Wet Mixture to it.
  6. Mix it well. Make sure there are no Clumps in the Mixture.
  7. Heat a Griddle or a Pan over a medium flame.
  8. Pour the Mixture into the Pan. The Mixture poured should be 1/4 of a Cup.
  9. Cook on both sides till it gets Brown.
  10. Serve hot. With 2-4 Pancakes over each other.

Tip:- 

If you are having trouble pouring the mixture on the pan, put it in a cleaned ketchup bottle 
(the bottle with a nozzle).
Use it to pour the mixture onto the pan.

Serving Suggestions:-

  1. Place some chopped strawberries on the Pancakes like the image below:-
  2. Place a tsp. of Butter on the Pancakes while they are hot like the image below:-


Social Media:-
If you like our work, don't forget to follow us on:


Twitter at:
https://twitter.com/Satyen_kulkarni

Google+ at:
https://plus.google.com/107967276868548579273

Instagram at:
https://www.instagram.com/satyenkulkarni/

Pinterest at:
https://www.pinterest.com/SatyenKulkarni/

We have also added the newsletter feature.
Subscribe to our Blog using your E-mail account to get notifications about New Posts on our Blog right into your E-mail account. It's completely free!
To subscribe, check the box in the Right Side Of The Page.
If you want to share this post check the social media buttons given below!!!
Remember, we are open for feedback!
We are also giving shout-outs on Twitter to anyone who is requesting a recipe!

Sunday, 11 September 2016

Chicken Tandoori

Before we start this weekly post, I just want to say Thank You to all of my readers because this blog has just reached 1000 views! (no. of views when this post was written)

Description:-

Chicken Tandoori is a dish consisting of Chicken pieces that are marinated and then cooked in a traditional oven which is known as tandoor. Hence the name Chicken Tandoori.


History:-

According to Wikipedia,

Tandoori chicken as a dish originated in the Punjab before the independence of India and Pakistan.Although tandoor cooked chicken dates back to as early as the Mughal era, the dish is believed to be invented by Kundan Lal Gujral, a man who ran a restaurant called Moti Mahal in Peshawar. Gujral moved to Delhi, India after the Independence of India and Pakistan and the subsequent partition of the Punjab Province.
In India, tandoori cooking was traditionally associated with the Punjab and became popular in the mainstream after the 1947 partition when West Punjabis resettled in places such as Delhi. In rural Punjab, it was common to have communal tandoors.Some villages still have a communal tandoor which was a common sight prior to 1947.


Recipe:-

 Ingredients:-

  • 1 whole chicken, cut into 10-12 pieces
  • 200 grams Yogurt/Curd/Dahi
  • 1 tbsp Butter
  • 1 tsp Turmeric Powder
  • 2 tbsp Chili Powder 
  • Salt
  • 2 tbsp Oil
  • 1 piece of Charcoal
  • Ginger Garlic Paste

How to make:- 

  1. Make a few cuts or incisions on each piece of Chicken
  2. Take a Bowl, and add Yogurt, Red Chili Powder, Ginger Garlic Paste (can be bought from shops) and Salt.
  3. Put the chicken pieces into the bowl and coat the Chicken with the mix that we just made (use of hands is recommended)
  4.  Keep this Marinated Chicken aside for 30 minutes.
  5. after 30 minutes, take a pan and add some Oil and Butter to it, let it heat on a medium flame.
  6. After the oil is moderately hot, add the marinated chicken pieces to it.
  7. Cook the Chicken for about 15-20 minutes till they get Golden Brown, make sure all the sides are cooked evenly.
  8. To add a smoky flavor to this dish, place the Cooked Chicken in a clean bowl.
  9. Take a piece of Charcoal and heat it directly on the flame until it gets red.
  10. Take a small cup or aluminum foil and place it on the top of the chicken pieces in the bowl.
  11. Place the hot Charcoal in the cup, and add a few drops of Oil to it.
  12. You will see smoke coming out of the Charcoal, cover the bowl with the chicken and the coal with a lid.
  13. Let it sit for about 1-2 minutes, and then plate.

Garnishing Suggestions:-

  • Garnish this dish with Coriander leaves, onion and lemon. 


Social Media:-
If you like our work, don't forget to follow us on:


Twitter at:
https://twitter.com/Satyen_kulkarni

Google+ at:
https://plus.google.com/107967276868548579273

Instagram at:
https://www.instagram.com/satyenkulkarni/

Pinterest at:
https://www.pinterest.com/SatyenKulkarni/

We have also added the newsletter feature.
Subscribe to our Blog using your E-mail account to get notifications about New Posts on our Blog right into your E-mail account. It's completely free!
To subscribe, check the box in the Right Side Of The Page.

Sunday, 28 August 2016

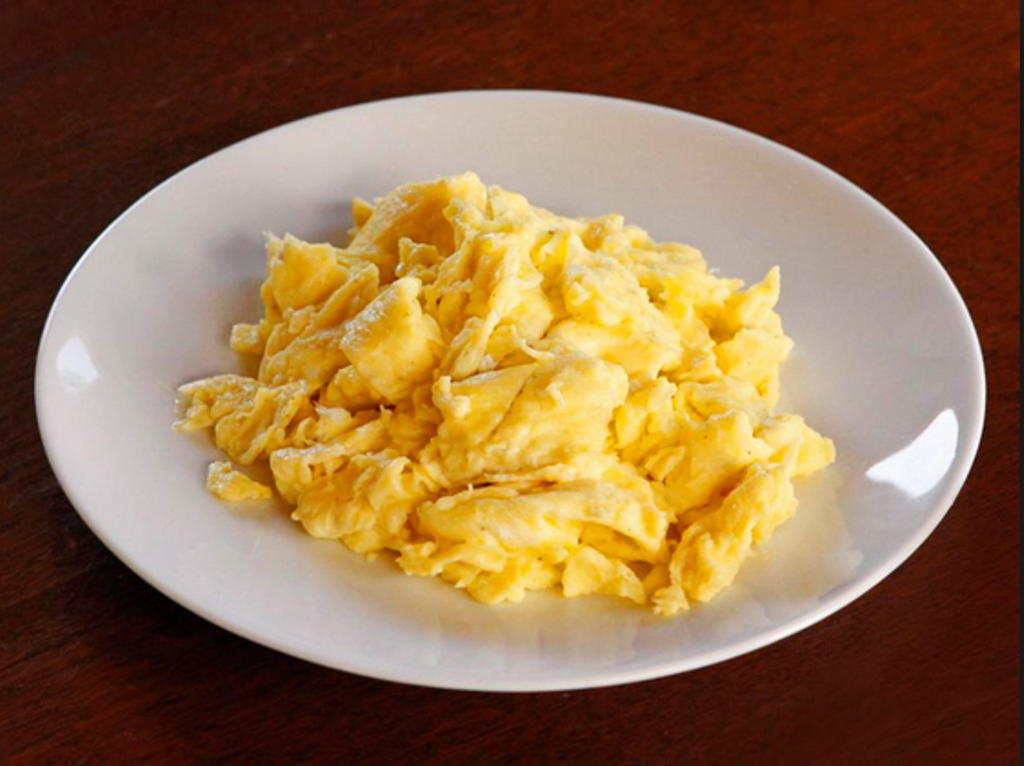
Simple & Delicious Scarmbled Eggs

Description:-

Scrambled eggs is a snack which can be made easily and quickly anytime, anywhere!
(of course you must have a cooking gas or microwave)
Personally speaking, scrambled eggs is one of my favorite dishes.
One can eat scrambled eggs as they are, or with a slice of bread, you can also garnish salads with it.


History:-

According to the available sources of history:-

The Ancient Romans were the first group to make omelettes. Later on, the 14th century Italian book "Libro della cucina" references scrambled eggs: "There is so much known about fried, roasted, and scrambled eggs that it is not necessary to speak about them." Unfortunately, there is no way of ever knowing who was the actual inventor of scrambled eggs.
 
Recipe:-


Ingredients:-
Please note that every Ingredient except Eggs is optional and are added just to enhance the flavor of the dish.
  • Eggs (2 eggs are sufficient for a person)
  • Salt (optional)
  • Milk (optional)
  • Pepper (optional) 
  • Butter 1 tsp.(optional)
  • A slice of bread(optional)

How to make:-
  1. First, crack two eggs in a bowl.
  2. Beat the eggs (whisk) till the Yolk is one with the Egg White.
  3. Add some salt to it.(Note- This and the next two steps are completely optional)
  4. Pour 3 tbsp. of Milk in the bowl, and mix.
  5. Sprinkle some Pepper in the bowl.
  6. Beat (whisk) the mixture well.
  7. Next heat a pan.
  8. Put 1 tsp. of butter in it.(optional)
  9. Let the butter melt.
  10. Next, pour the mixture into the pan.
  11. Continuously stir the mixture on medium flame, till you get the desired consistency.
  12. Serve hot with a slice of bread.


Social Media:-

If you like our work, don't forget to follow us on:


Twitter at:
https://twitter.com/Satyen_kulkarni

Google+ at:
https://plus.google.com/107967276868548579273

Instagram at:
https://www.instagram.com/satyenkulkarni/

Pinterest at:
https://www.pinterest.com/SatyenKulkarni/

We have also added the newsletter feature.
Subscribe to our Blog using your E-mail account to get notifications about New Posts on our Blog right into your E-mail account. It's completely free!
To subscribe, check the box in the Right Side Of The Page.

Don't Forget to Comment and Give a Feedback!!!

Sunday, 21 August 2016

Raw Banana Cutlet

Description:

The Banana Cutlet is a healthy substitute of a Potato Cutlet.
The Crust is Crispy and the inside is soft.
You will be in love with this Cutlet once you eat it!


Recipe:


Ingredients:


  • Raw Bananas boiled and mashed - 4
  • Green Chilies chopped - 1 tbsp.
  • Cumin Seed powder - 1 tsp. or According to taste.
  • Lemon Juice - 1 tsp.
  • Salt
  • Oil


How To Make:


  1. Take the Boiled and Mashed Bananas in a Bowl.
  2. Add the Green Chilies to the Bananas.
  3. Sprinkle the Cumin Seeds powder on the Bananas and Green Chilies.
  4. Pour the Lemon Juice in the Bowl.
  5. Add Salt to taste.
  6. Mix the Ingredients well, but Don't over mash the Bananas
  7. Next, take a Pan and pour Oil in the pan and let it heat for 2-3 Minutes.
  8. Roll the mixture into small balls.
  9. Put the balls on the pan and let it cook for 7-8 Minutes on each side on Medium Flame.
  10. Next, put the Cutlets on a Plate (and average serving size is 3 Cutlets).
  11. And your Raw Banana Cutlets are done!


Garnishing Suggestions:


  • Crush some Roasted Peanuts and sprinkle them on the Cutlets.
  • You can also sprinkle some Chopped Coriander Leaves


Social Media:
If you like our work, don't forget to follow us on:


Twitter at:
https://twitter.com/Satyen_kulkarni

Google+ at:
https://plus.google.com/107967276868548579273

Instagram at:
https://www.instagram.com/satyenkulkarni/

Pinterest at:
https://www.pinterest.com/SatyenKulkarni/

We have also added the newsletter feature.
Subscribe to our Blog using your E-mail account to get notifications about New Posts on our Blog right into your E-mail account. It's completely free!
To subscribe, check the box in the Right Side Of The Page.

Don't Forget to Comment and Give a Feedback!!!


Thursday, 7 July 2016

The Most Delicious & Easy Microwave Mug Cake

 Description:-


  Holding a hot mug full of freshly baked cake on a rainy day is just the thing everyone wants! Today is about the MIGHTY MUG CAKE! The Mug Cake is both an Exciting to make and Delicious to Eat! 


Recipe:-


Ingredients:-

  1. 2 teaspoon Milk
  2. 2 teaspoon Butter (melted)
  3. 2 teaspoon Sugar (powdered)
  4. 2 teaspoon Cocoa Powder
  5. 2 tablespoon All Purpose Flour

How to make:-

  •  Take a Microwaveable Mug
  • Pour 2 teaspoons of Milk in the Mug
  • Put 2 teaspoons of melted Butter in the Milk 
  • Carefully mix the Milk and Butter
  • Then put 2 teaspoons of Powdered Sugar in the Milk and Butter
  • Stir the Sugar till there are no Clumps
  • Next, put 2 teaspoons of Cocoa Powder and Mix
  • Then put 2 TABLESPOONS of All Purpose Flour and Mix. {Please note the difference between teaspoon and tablespoon}
  • Then put the Mug into the Microwave and set the Microwave for 2-3 Minutes {Note that the time to cook to perfection may vary from Microwave to Microwave}
  • And your Microwave Mug Cake is Ready!

You can also add chocolate chips in the mix and bake!!!

Happy #WorldChocolateDay !!!

If you like our Work, then Don't forget to follow us on:

Twitter at:
https://twitter.com/Satyen_kulkarni

Google+ at:
https://plus.google.com/107967276868548579273

Instagram at:
https://www.instagram.com/satyenkulkarni/

Pinterest at:
https://www.pinterest.com/SatyenKulkarni/


We have also added the newsletter feature.
Subscribe to our Blog using your E-mail account to get notifications about New Posts on our Blog right into your E-mail account. It's completely free!
To subscribe, check the box in the Right Side Of The Page.

Don't Forget to Comment and Give a Feedback!!!


Friday, 17 June 2016

Quick and Easy Potato Chips Recipie....

Hey Guys!!! Today I will show you how to make QUICK & EASY POTATO CHIPS in your MICROWAVE!!!
Ingredients:
1] 2-3 Potatoes
2]Salt and Pepper [According to taste]
How To Make:
1]First, wash the potatoes...so that no dirt remains on the potatoes.
2] Then, take a slicer and slice the potatoes into thin slices. If you don't have a slicer...slice the potatoes using a knife, but make sure that the slices are thin enough to cook in a microwave!!!
3] Take a microwave-safe plate and oil or grease it up a bit. Place the patato slices on to the plate.
4] Place the plate in the microwave and set the timing to 2-3 minutes. *Note that the timings may change according to your microwave.*
5] After the slices become Golden Brown, take out the plate and empty it in a bowl, so that the chips can cool down.
6] After a minute or two the chips become Crispy.
7] Sprinkle some salt and pepper (or any spice of your choice) and toss the chips in the bowl so that all chips are coated evenly.
8] Serve with Ketchup or any other DIP of your choice.
If you like our Work, then Don't forget to follow us on:

Twitter at:
https://twitter.com/Satyen_kulkarni

Google+ at:
https://plus.google.com/107967276868548579273

Instagram at:
https://www.instagram.com/satyenkulkarni/

Pinterest at:
https://www.pinterest.com/SatyenKulkarni/


We have also added the newsletter feature.
Subscribe to our Blog using your E-mail account to get notifications about New Posts on our Blog right into your E-mail account. It's completely free!
To subscribe, check the box in the Right Side Of The Page.

Don't Forget to Comment and Give a Feedback!!!